Hey guys we are back with another useful 3uTools tutorial guide on iDevice users.
Today we’re gonna show you that how to convert HEIC(High Efficiency Image Format) to JPEG.
But why you should convert from HEIC to JPEG.
Actually it’s depend on your necessary only.
Before you are going to touch this topic let’s read a bit about the history of HEIC images.
This effect impose for iPhone 7 and latest.
Apple has been added HEIC image quality from iOS 11.
They have been added this quality due to reduce the size of images.
This will help you to save your device free space.
But most of HEIC quality images are not support sometimes on Windows and other platforms.
Therefore users should convert those images to a supportive format such as JPEG.
So the easiest way to perform this is using 3uTools.
Table of Contents
How To Convert From HEIC To JPEG
First of all you should connect your device to the PC which you are using 3uTools.
If you wanted images already store in your PC , you don’t want to connect your device to the PC.
Unless you can directly use your iDevice to done this job easily.
Step 01:Launch 3uTools & go to ToolBox.
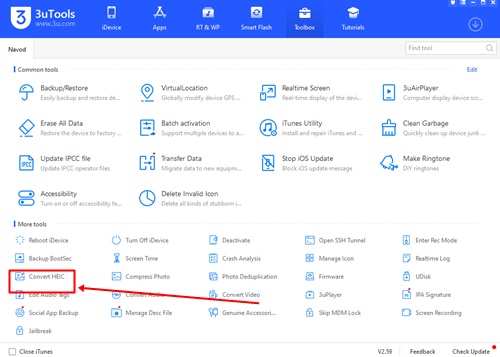
Step 02:Then click “Convert HEIC”.
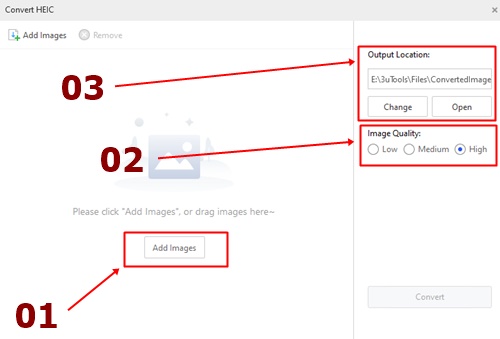
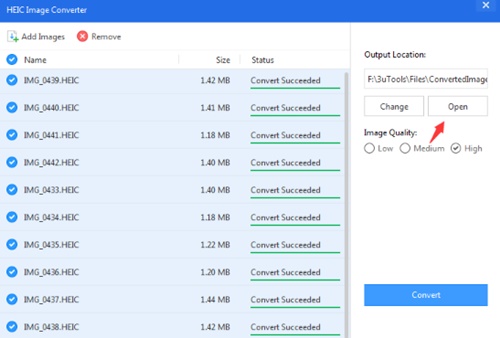
Step 03:Now you have main three steps to follow.
- Add image.
- Select you want image quality.
- Select your output location.
Step 04:After you apply successfully above main three steps , click “Convert” button.
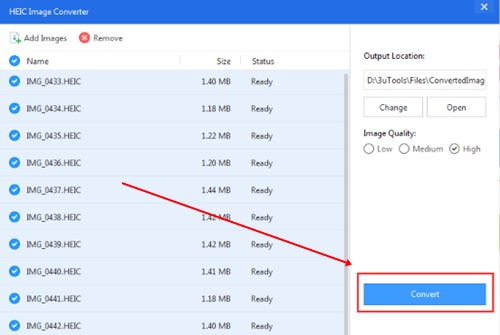
Step 05:Finally you will be received the finished message and click “OPEN”.
So we suppose that you may have gained a complete idea about the converting HEIC images to the JPEG quality.
Thus we recommend on all users to follow these simple steps correct as well as we mentioned order.
Then you can be succeeded.
Conclusion
HEIC images converter of 3uTools is a free tool and users can easily use it.
So our tutorial guide will help you to do this by yourself indeed.
Please share your experience with us and keep touch with us.
Thank You!